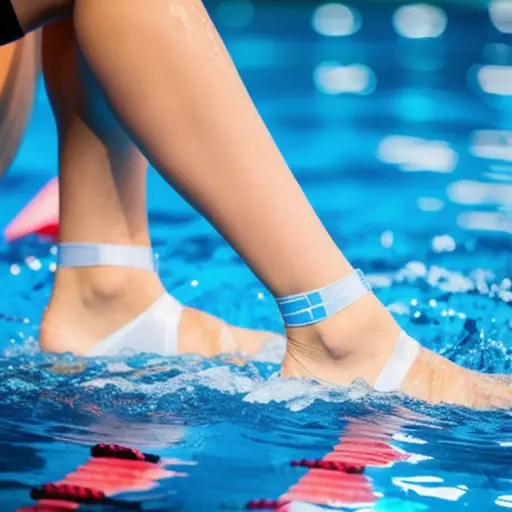
Have you ever experienced a sudden ankle twist or sprain while gliding smoothly through the water? The pain can be excruciating and, if not addressed properly, can result in long-term consequences. Swimming, just like any other sport, carries its own set of risks and injuries, but fear not fellow swimmers! In this blog post, we are going to delve deep underwater to explore the effective technique of taping your ankle to enhance stability, reduce pain, and most importantly, keep you in the swim of things. So, strap on your goggles, tighten your swim cap, and let’s dive into the world of ankle taping for swimming.
Proper ankle positioning for taping in swimming
Ankle taping is a crucial aspect in swimming, especially for those experiencing an ankle sprain or injury. The main goal of taping is to provide support and stability to the ankle joint and prevent further injury during activities such as swimming. Proper ankle positioning in taping for swimming plays an essential role in ensuring the effectiveness of the tape and the comfort of the swimmer.
One of the key aspects in ankle positioning is to maintain a neutral position during the taping process. This means that the foot should neither be pointed (plantar flexed) nor pulled upward (dorsiflexed). However, according to a study by Timothy Carver, the head athletic trainer at Oberlin College, swimmers might require a slightly different approach. The study suggests that ankle taping could be adapted in swimming by supporting the ankle primarily in the pointed toe (plantar flexed) position, which is vital for a strong propulsion in the water.
In conclusion, proper ankle positioning is essential for effective taping in swimming. Based on the study mentioned above, it is advisable to consider supporting the ankle in the pointed toe position when taping an ankle to achieve optimum results while keeping the swimmer comfortable and minimizing pain. Always consult with a professional athletic trainer or therapist for personalized advice, as individual cases may vary.
Choosing the right type of tape for swimming
When taping an ankle for swimming, it’s crucial to choose the right type of tape that offers optimal support and prevents injury without hindering your mobility in the water. Generally, there are two options for taping your ankle: athletic tape and kinesio tape.
Athletic tape is designed to restrict movement and provides significant support to prevent injury or restrict motion. It is commonly used by athletes when a substantial amount of stability is required. However, it might not be the best option for swimming as it could affect circulation and limit flexibility.
Kinesio tape, on the other hand, is a more suitable choice for swimmers. It is made from stretchy, latex-free elastic and cotton fibers that do not restrict circulation or movement, allowing for a greater range of motion in the ankle. This type of tape can be worn for up to five days without the need for frequent reapplication, as it is waterproof and does not lose its effectiveness when exposed to water.
When deciding on the appropriate tape for swimming, consider the specific needs of your ankle, your level of activity in the pool, and the duration of time you need the tape to stay on. Kinesio tape is often recommended for swimmers due to its ability to provide support and flexibility without negatively impacting performance or comfort.
Preparing the ankle before taping
Before learning how to tape an ankle for swimming, it’s essential to prepare the ankle correctly to ensure an effective taping job that provides the necessary support. Adequate preparation also helps avoid irritation, slipping, or discomfort during the activity. Here are the steps to follow for proper ankle preparation:
First, clean and dry the skin around the ankle to remove any oils or lotions that might reduce the tape’s adhesion. If necessary, trim or shave any excess hair around the area for better adhesion. Avoid taping over open wounds or sores.
Next, gather all required materials, such as athletic or kinesio tape, quick-drying adhesive, pre-wrap, and non-adhesive pads (to prevent blistering). When using athletic tape, it is helpful to have a base spray and heel or lace pads for added comfort and effectiveness.
Apply a base spray if using athletic tape, followed by heel and lace pads on the top of the foot and over the heel. Then, wrap the ankle with pre-wrap, starting at the arch of the foot and working upwards to cover the ankle and about 3 inches above it. Applying a quick-drying adhesive to secure the pre-wrap could be beneficial, but be sure to follow the manufacturer’s instructions closely. The ankle is now ready for taping, and you can proceed by choosing the appropriate taping technique based on the type of tape you plan to use.

Applying the tape securely for swimming
Swimming is a vigorous workout that requires flexibility and mobility. To ensure you enjoy your time in the pool without further aggravating an existing ankle injury, it’s crucial to apply kinesiology tape securely and correctly. Here’s a step-by-step guide for applying kinesiology tape on the ankle, tailored for swimming activities.
Start by thoroughly cleaning and drying the ankle to remove any dirt, oil, and moisture. This ensures the tape adheres properly and stays put even when submerged in water. Next, position the ankle in a neutral position – neither pointing nor flexing. This ensures the tape provides optimal support without restricting range of motion.
Cut the tape into three strips – one long anchor piece and two shorter support strips. Place the anchor strip at the bottom of the foot, just below the ankle, and wrap it around the outside of your ankle and up to the other side. Be sure the tape isn’t too tight or too loose to maintain optimal blood flow and movement. Next, apply the support strips. Starting at the top of the anchor strip, apply a support strip diagonally across the ankle to the bottom of the foot. Repeat this step with the second support strip, creating an “X” pattern over the ankle joint.
Once the tape is in place, gently rub it to activate the adhesive, ensuring a secure bond. Now you’re ready to hit the pool! Remember to dry the tape when you exit the water using a towel or a hairdryer on a low temperature. By following these simple steps, your ankle will be well supported, allowing you to continue swimming without restricted movement.
Ensuring proper adhesion in water
When it comes to taping an ankle for swimming, ensuring proper adhesion in water is crucial. The tape should provide both support and flexibility, allowing the swimmer to move comfortably without restricting their range of motion. To ensure optimal adhesion in water, follow these five steps:
1. Choose the right tape: When swimming, it is essential to use a waterproof tape that can withstand water exposure. Kinesio tape or RockTape’s H2O line are both excellent choices for swimmers, as they’re designed to stay in place even when wet.
2. Clean and dry the skin: Before applying the tape, make sure your skin is clean and dry. It5. Ensuring Proper Adhesion in Water
When taping an ankle for swimming, it is crucial to ensure the tape adheres properly to the skin, despite the presence of water. This will not only provide the necessary support to the ankle joint but also reduce the risk of tape coming off during the activity. Following these steps can help achieve proper adhesion in water:
Firstly, choose a waterproof tape like Kinesio, which is designed to stay on in water, or opt for RockTape H2O, specially created for water-based exercises or for people who perspire excessively.
Secondly, prep the skin by ensuring it’s clean, dry, and free from any lotions or oils. Trim the hair around the ankle area if necessary, as the tape adheres better to smooth skin. Using a taping base spray can also improve adhesion, as it reduces friction and enhances the tape’s grip on the skin.
Thirdly, make sure to apply the tape correctly by following the manufacturer’s instructions. Overlap the tape edges while applying it, and avoid stretching the tape too much. It’s recommended to leave at least an inch of unstretched end to create a strong anchor and prevent skin irritation.
Lastly, apply the tape at least an hour before swimming to allow the adhesive to stick well to the skin. Using a hairdryer or a heat pack can help activate the adhesive, contributing to better adhesion for an improved swimming experience.
Removing the tape after swimming
After a long and enjoyable swimming session, you may find that it’s now time to remove the tape from your ankle. Since swimming involves constant exposure to water, it is important to carefully remove the tape to ensure your skin remains undamaged and irritation-free. Here are a few tips for safely removing the tape after swimming:
1. Make sure your skin is completely dry before attempting to remove the tape, as it may be easier to peel the tape away from the skin when it’s dry. Gently pat your skin dry with a towel, and wait for a few minutes to ensure that it is no longer damp.
2. As mentioned earlier, peeling the tape off too quickly or aggressively can cause skin irritation. Instead, gently lift the edge of the tape and slowly peel it back in the direction of your hair growth, rather than against it.
3. To minimize discomfort during the tape removal process, consider using a small amount of oil or lubricant. Applying a thin layer of oil to the tape can help weaken its adhesive qualities, making it easier to peel off.
4. Another helpful technique is to stretch the skin underneath the tape while removing it. This can reduce resistance and make it easier for the tape to come off.
5. If you find that the tape is particularly stubborn, remember that patience is key. Allow the tape’s adhesive to gradually loosen naturally over time. You might need to wait a few hours or even a day before attempting to remove the tape again.
In conclusion, taking the time to gently and safely remove the tape after swimming can prevent skin damage and irritation, ensuring that you have a positive experience in the water and beyond.
Drying the tape for re-use
Title: How to Tape an Ankle for Swimming: Ensuring Stability and Reusability
When taping an ankle for swimming, it is essential to ensure stability, support, and reusability. One way to enhance the longevity of the tape application is by effectively drying it for reuse. Here’s a seven-step guide to help you achieve this process.
Step 1: Upon exiting the pool, gently pat the taped ankle dry with a clean towel. Avoid rubbing the tape, as this may cause it to peel.
Step 2: To further remove any remaining moisture, use a hairdryer on a low heat setting. Hold the dryer at least 6 inches away from the tape and move it in a back-and-forth motion to prevent overheating the adhesive.
Step 3: After drying the tape, check the adhesive for any sign of loosening. If the tape has lost its stickiness or shows signs of wear, it is best to replace it with a new application.
Step 4: If the tape is still in good condition, carefully remove it from the ankle.
Step 5: Place the tape on a clean, flat surface, adhesive side up, and let it air-dry for an additional 10-15 minutes.
Step 6: Store the dried tape in a cool, dry place away from direct sunlight or heat sources. This will help prolong its adhesive life for future use.
Step 7: Reapply the tape in accordance with the initial taping instructions, making sure to clean the skin thoroughly before application.
By following these guidelines, you can effectively dry your ankle tape and get more use out of each application while ensuring the safety and efficiency of the process. Remember, it is essential to consult a professional before choosing a taping method to address any lingering concerns or uncertainties.
Tips for maximizing tape longevity in swimming
When using tape to support your ankle while swimming, it’s essential to maximize its effectiveness and longevity. Follow these tips to ensure that the tape stays in place and provides the support you need throughout your swimming session:
1. Choose the right tape: Opt for waterproof kinesio tape, as it is designed to provide support without restricting movement and can stay on for up to 5 days.
2. Prepare your skin: Clean and dry your skin thoroughly before applying the tape to ensure proper adhesion. Avoid taping over open wounds or sores.
3. Use a base spray: Applying a base spray on the ankle and foot area can help reduce friction and improve tape adherence.
4. Apply heel and lace pads: These pads can prevent blistering and discomfort caused by rubbing against your shoes or the pool’s edge.
5. Wrap correctly: Follow the proper technique for taping your ankle, ensuring that the tape is neither too tight nor too loose.
6. Use prewrap: A soft, stretchy prewrap makes removing the athletic tape easier and prevents skin irritation caused by direct contact with the adhesive.
7. Test the tape: Before stepping into the water, test the tape by walking around to ensure it provides the right level of support and stays in place.
8. Avoid overstressing the taped area: While swimming, try not to overexert the ankle area to maximize the tape’s effectiveness and longevity.
By following these tips, you can ensure that your taped ankle remains supported and protected throughout your swimming sessions, promoting healing and preventing further injury.
Rehabilitating injured ankles with taping in swimming
Swimming is often considered a low-impact sport, which can be beneficial for individuals who are recovering from injuries. One such injury that can be managed during swimming is an ankle injury. Proper taping of the ankle can provide support, relieve pain, and aid in the healing process while allowing the individual to participate in swimming activities.
Taping an ankle for swimming involves using water-resistant tape, such as athletic or Kinesio tape, which can withstand the aquatic environment. Athletic tape provides rigidity and will restrict movement, offering stability to the injured ankle. On the other hand, Kinesio tape offers more flexibility and can be worn for longer periods, making it suitable for individuals returning to physical activity or those with unstable ankles in general.
To tape the ankle, start by applying pre-wrap or clean, dry skin. Next, use athletic tape to create anchor strips around the upper portion of the ankle, followed by a stirrup that goes over the ankle and heel. The final step is to create a figure-eight pattern, covering and reinforcing the previous strips. It is crucial to ensure the taping is secure but not too tight, as this can cause discomfort and circulation issues.
Proper ankle taping can help individuals rehabilitate their injured ankles while swimming, providing support and stability throughout the healing process. However, it is essential to consult with a medical professional before engaging in any physical activity to prevent further injury.
Warning signs to look for during taping for swimming activities
When taping an ankle for swimming activities, it’s essential to pay attention to any warning signs indicative of improper application. If not addressed, the issue may lead to discomfort, reduced performance, or potential injuries. Here are ten warning signs to look for during taping:
1. Discoloration (bluish or whitened skin) around the taped area, which may signal restricted blood flow.
2. Pins and needles or numbness in the foot or toes, a possible indicator of poor circulation or nerve compression.
3. Excessive redness or swelling of the ankle, an adverse reaction to either the tape or the taping technique.
4. Excessive pain or discomfort while swimming, indicating that the tape may be either too tight or incorrectly placed.
5. Worsening of pre-existing ankle issues, such as instability or pain, revealing that the tape may not provide adequate support.
6. Developing blisters or other skin irritations, as a result of the adhesive or friction from the tape.
7. Difficulty or reduced range of motion in your ankle following tape application.
8. The tape consistently loosening or losing adherence during swimming, suggesting a need for retaping or more waterproof tape options.
9. Manifesting other unusual symptoms, such as dizziness, while wearing the tape, which might indicate an allergic reaction to the adhesive.
10. Overall difficulty or discomfort while swimming, negatively impacting your performance.
It’s crucial that you pay close attention to your body when using ankle tape for swimming activities. If you experience any of the mentioned warning signs, consult your healthcare professional or a qualified athletic trainer to assess the problem and recommend appropriate adjustments or alternatives.


