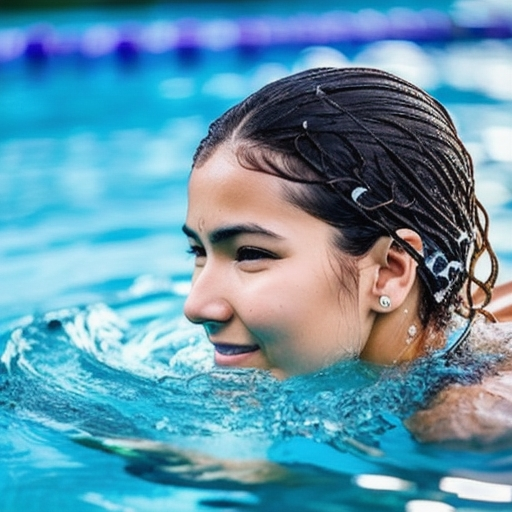
It’s happened to pretty much all of us: you’ve enjoyed a refreshing dip in the pool or a splash in the ocean, toweling off and basking in the sun’s warm embrace. Suddenly, you’re hit with an all-too-familiar sensation – that maddening feeling of water trapped in your ear. No matter how many awkward head tilts or intricate ear maneuvers you try, it just won’t budge. It’s enough to drive a person crazy! Fear not, fellow water enthusiasts! In this blog post, we’re going to dive deep into the science and art of safely dislodging that stubborn water and reveal the most effective techniques to get water out of your ear after swimming. So, read on and prepare to say goodbye to that underwater symphony for good!
Dry ears with a soft towel or cloth
Swimming can be a fun and relaxing activity, but one common issue people face is getting water trapped in their ears. If left untreated, this can cause muffled hearing and even lead to an infection known as swimmer’s ear. Here are a few tips to help you safely get water out of your ears post-swim, ensuring dryness and avoiding infections.
Firstly, it’s essential to dry your outer ears gently using a soft towel or cloth. Avoid sticking the cloth into the ear canal, as this can push the water further in and potentially lead to infection. Instead, simply dab the outer part of your ears, making sure to be gentle and not cause any irritation.
Next, tip your head to one side while gently pulling on your earlobe. This action straightens your ear canal, allowing the trapped water to flow out. You can also try turning your head quickly, as this motion may help dislodge the water.
For further assistance, use a blow dryer on the lowest setting to evaporate the remaining water. Hold the blow dryer at least a foot away from your ear and direct the warm air towards your ear canal. Be cautious not to use a high setting or hold the device too close, as this can cause injury.
Alternatively, over-the-counter drying drops are available for purchase or can be made at home. A simple solution of equal parts white vinegar and rubbing alcohol can be poured into the ear, tilted to allow drainage. Make sure to avoid using drying drops if you have ear tubes, a ruptured eardrum, or other ear issues.
By following these easy tips, you can safely remove water from your ears after swimming, ensuring a comfortable and healthy experience. Remember to consult your doctor if your ear issues persist or worsen.
Avoid sticking anything into your ear canal : The Importance of Ear Safety
It can be tempting to reach for a cotton swab or other small object when trying to remove water from your ear canal after swimming, but this method can be harmful and should be avoided. By sticking anything into your ear canal, you risk damaging the delicate skin and causing infections. Instead, there are several safe and effective ways to remove water from your ear without causing harm.
The outer ear, middle ear, and inner ear all work together to produce sound, but the ear canal is particularly vulnerable to injury. When you insert an object into the ear canal, you risk scratching or tearing the thin layer of skin that lines it. This can lead to inflammation, pain, and possible infection. Additionally, inserting a cotton swab or other object into the ear canal can push earwax and debris further in, leading to impaction and discomfort.
Safe methods to remove water from your ears after swimming include gently tugging the earlobe while tilting your head to one side or using a blow dryer on the lowest setting to evaporate the water. Over-the-counter drying drops or a homemade solution of equal parts white vinegar and rubbing alcohol can also help to safely dry out the ears.
If you or your child have a history of ear infections or have tubes in your ears, it is essential to be extra cautious when drying the ears. Consult with a healthcare professional for personalized recommendations to avoid complications. Overall, avoiding the insertion of foreign objects into the ear canal is a crucial step in maintaining ear health and preventing unnecessary damage.

Tip your head to one side to drain water
Are you struggling with waterlogged ears after a refreshing swim? This common annoyance occurs when water gets trapped inside your ear canal, causing sounds to become muffled and creating an uncomfortable feeling of fullness. If left unresolved, this could potentially lead to an infection called swimmer’s ear. But fear not, as we have an easy, effective solution to help you drain water from your ears safely and quickly.
One popular method to dry your ears after swimming is by simply tipping your head to one side to let gravity work its magic. Place a dry, soft towel or cloth against the outer part of your ear as you tilt your head, making sure not to insert it inside. This position helps open up your ear canal and allows the trapped water to flow naturally.
Gently pulling on your earlobe can also help straighten the ear canal and improve drainage. Combining these actions with a slight shaking motion may further expedite the process. Avoid inserting objects like cotton swabs or fingers into the canal, as this could scratch the delicate skin or push the water further inside, potentially causing more harm than good.
Additionally, consider investing in over-the-counter ear-drying drops to hasten the drying process, or concoct a homemade mixture of equal parts white vinegar and rubbing alcohol to dry out the trapped water. Always consult your doctor for approval and recommendations before applying these solutions, especially if you have tubes in your ears or a history of ear infections.
In conclusion, tipping your head to one side and using gravity is a safe and effective way to get water out of your ear after swimming. Prevent waterlogged ears by wearing earplugs or using a swim cap while you swim, and always dry your ears properly to keep them clean and healthy.
Try over-the-counter drying drops
How to Get Water Out of Your Ear After Swimming: Try Over-the-Counter Drying Drops
At times, water trapped in the ear after swimming can cause discomfort and may even lead to an ear infection called swimmer’s ear. To prevent this from happening, consider trying over-the-counter (OTC) drying drops, which are specifically designed to remove trapped water from the ear canal. Designed with a gentle formula, these drops can provide relief and prevent potential complications.
OTC drying drops usually contain ingredients like isopropyl alcohol, which helps to break the surface tension of the trapped water and facilitate its removal. They may also contain an astringent or an antimicrobial agent to help prevent the growth of bacteria in the ear canal, further reducing the risk of infection. When choosing a suitable drying drop product, look for those that have been tested for safety and efficacy, and follow the manufacturer’s guidelines for use.
To use these drops, tilt your head to the side, with the affected ear facing upwards. Carefully place the recommended number of drops into your ear using a sterile dropper, following the product’s instructions. Keep your head tilted for a few moments to allow the drops to penetrate your ear canal. Then, tilt your head in the opposite direction, allowing the drops and any trapped water to drain out.
It’s important to note that you should not use drying drops if you have a pre-existing ear infection, an ear perforation, or if you are wearing ear tubes. In such cases, consult your healthcare provider for proper guidance. Remember, using OTC drying drops is just one of the many methods available to help you get water out of your ear after swimming, ensuring you continue to enjoy your favorite water activities without any discomfort.
Avoid using cotton swabs or fingers
Having water trapped in your ear after swimming can be uncomfortable and even lead to an infection if not attended to properly. Here are some safe and effective ways to get water out of your ear.
1. Gently dry the outer ear with a soft towel or cloth, without inserting it into the ear canal.
2. Tilt your head to one side, allowing the water to drain naturally. You can also gently pull your earlobe in different directions to help straighten the ear canal and promote the water flow.
3. Yawn, wiggle your jaw, or make exaggerated chewing motions to encourage the water to move towards the outer canal, then gently tug at your earlobe.
4. Try applying a warm compress to your affected ear. Soak a towel in warm water, squeeze out the excess, and fold it over your ear while tilting your head. The warmth can help relax the ear tissues and promote drainage.
5. Create suction by cupping your palm over your ear and pressing lightly towards your head before pulling away. Repeat this process several times, followed by tilting your head down to allow the water to drain.
6. Consider over-the-counter drying drops if it’s safe for you to use. Alternatively, mix equal parts white vinegar and rubbing alcohol, and pour one teaspoon into your ear. Gently tilt your head and let it drain out.
7. Avoid using cotton swabs or inserting your fingers into your ears, as this can cause damage, scratch the delicate skin, or worsen the problem by pushing the water deeper. Always consult your doctor before attempting any treatments, especially if you have ear tubes or a history of ear infections.
Look out for swimmer’s ear symptoms
When planning a day of swimming, whether it’s at the beach, lake, or pool, many of us don’t anticipate the discomfort that comes from getting water trapped in our ears. Though generally not serious, it can lead to a more severe infection known as swimmer’s ear if not dealt with properly. In order to effectively resolve the issue and prevent any further complications, it’s essential to recognize the symptoms of swimmer’s ear and take appropriate action.
Swimmer’s ear, or otitis externa, is an infection that occurs in the outer ear canal, often due to water being trapped in the ear after swimming. This damp environment facilitates bacterial growth, leading to inflammation, redness, and pain in the ear. Some common symptoms of swimmer’s ear include itching, discomfort or pain that worsens when pulling on the earlobe, a feeling of fullness in the ear, along with muffled hearing or temporary hearing loss, and in some cases, a clear or yellowish fluid drainage from the affected ear.
If you notice any of these symptoms after a swim, it’s crucial to take immediate action to prevent the infection from worsening. Over-the-counter eardrops or a homemade solution of equal parts white vinegar and rubbing alcohol can aid in drying out the ear and reducing the risk of infection. However, if the symptoms persist or worsen, it’s best to consult a healthcare professional for a proper diagnosis and treatment plan.
In conclusion, being aware of swimmer’s ear symptoms is an essential aspect of maintaining healthy ears after swimming. By promptly addressing any discomfort or changes in your ears, you can enjoy your time in the water and reduce the risk of ear infections.
Use preventive measures
How to Prevent Water Trapped in Your Ear After Swimming: Top 9 Tips
Swimming can provide numerous benefits to the body, but sometimes, water can get trapped inside the ear, causing discomfort and muffled hearing. Fortunately, there are preventive measures that you can take to avoid this issue. Here are nine tips to help you enjoy swimming without the unpleasant experience of water trapped in your ear:
1. Wear a swimming cap: Using a swimming cap not only helps keep your hair dry but also helps prevent water from entering your ears.
2. Use earplugs: Wearing earplugs designed specifically for swimmers can be an effective way to keep water out of your ears while swimming.
3. Dry your ears after swimming: Make it a habit to dry your ears immediately after swimming to prevent any water from remaining in your ear canal.
4. Tilt your head to drain water: After swimming, tilt your head to one side and gently pull your earlobe to help water flow out of your ear canal.
5. Avoid inserting objects in your ears: It’s crucial not to insert any objects, such as cotton swabs or fingers, into your ears to remove water, as it may cause damage and increase the risk of infection.
6. Apply over-the-counter drying drops: These products can help evaporate any trapped water in your ears and decrease the chance of infection.
7. Keep your ears clean: Regular ear hygiene is essential to prevent excess wax buildup that can trap water inside the ear canal.
8. Avoid swimming in polluted water: Swimming in clean water will lower the risk of bacteria entering your ears, which can lead to infections.
9. Consult a doctor for persistent problems: If you frequently experience water trapped in your ear despite following these preventive measures, consider consulting a healthcare professional for advice and treatment options.
By implementing these tips, you will be well on your way to a water-free and enjoyable swimming experience. Happy swimming!
Consult with a doctor if necessary
It’s a common and uncomfortable feeling: water trapped in your ear after swimming. This sensation can be bothersome, leading to muffled sounds and difficulty hearing. In most cases, the water will naturally drain from your ear canal, but in some instances, it can become trapped and may even lead to an infection. If you find yourself struggling with water-clogged ears, follow these simple and effective remedies. However, if none of these methods work or you experience pain, it’s essential to consult with a doctor.
1. Use gravity to your advantage by tilting your head towards the affected ear and gently pulling your earlobe downward.
2. Try the Valsalva maneuver by pinching your nose closed, closing your mouth, and gently blowing as if to clear your ears.
3. Create a vacuum by cupping your hand over the affected ear and gently pushing back and forth.
4. Apply a warm compress to promote blood circulation and relax the ear tissues, enabling drainage.
5. Utilize ear drops containing a mixture of alcohol and vinegar to help evaporate the water and prevent infection.
6. Consider over-the-counter earwax removal drops if water is trapped by debris in your ear canal.
7. Use a blow dryer on its lowest setting and keep it about a foot away from your ear, allowing the warm air to evaporate the trapped water.
8. Add a few drops of warm olive oil to your ear to help lubricate and repel the water.
9. Attempt to flush out the trapped water by adding more water to the affected ear using a dropper and tilting your head to drain the fluids.
10. If all else fails and you experience persistent pain or discomfort, consult with a doctor who may prescribe medicated eardrops or perform aural toilet if necessary.
Remember to approach ear care responsibly and avoid inserting any foreign objects into your ear canal to prevent injury. Take note of these tips, and enjoy your time in the water without the hassle of trapped water in your ears.


